Have you ever wondered why the air in your car smells a bit off? Or why you sneeze more when driving?
The answer might lie in your car’s cabin air filter. Many drivers overlook this small but crucial component, yet it plays a significant role in ensuring the air inside your vehicle is fresh and clean. A dirty or clogged cabin air filter can lead to unpleasant odors, reduced airflow, and even impact the efficiency of your air conditioning system.
By learning how to change your car’s cabin air filter, you not only improve your driving experience but also protect your health. Imagine breathing cleaner air every time you drive—sounds appealing, right? Let’s dive into the simple steps you can take to make that a reality. Your car and your lungs will thank you.
Tools And Materials Needed
Gather a new cabin air filter, screwdriver, and flashlight. Ensure you have a clean rag and protective gloves. Keep your car manual nearby for guidance.
Changing your car’s cabin air filter is a simple task that can save you money and improve the air quality in your vehicle. Before you dive into this DIY project, it’s essential to gather all the necessary tools and materials. Having everything ready will make the process smoother and more efficient, allowing you to focus on getting the job done without unnecessary interruptions. Let’s take a closer look at what you’ll need.Basic Tools
You’ll be pleased to know that changing a cabin air filter doesn’t require a toolbox full of specialized equipment. Most often, a basic screwdriver will suffice. Depending on your car’s make and model, you might need a Phillips or a flathead screwdriver. Check your vehicle’s manual to confirm this. Sometimes, you might not need any tools at all. Many car models have cabin air filter compartments that are easily accessible by hand.Replacement Cabin Air Filter
The most crucial item on your list is the replacement cabin air filter. Make sure it’s the correct size and type for your vehicle. You can find this information in your car’s manual or on the old filter itself. Opt for high-quality filters that can capture dust, pollen, and other particles effectively. It can make a noticeable difference in the air quality inside your car.Gloves And Mask
While not strictly necessary, wearing gloves and a mask can be beneficial. Dust and debris can accumulate in the filter compartment, and you might want to protect your hands and respiratory system. It’s an excellent precaution, especially if you have allergies. Plus, it keeps your hands clean.Cleaning Supplies
A small vacuum or a soft brush can come in handy to clean the filter compartment. Dust and debris often settle in this area, and cleaning it before installing the new filter ensures optimal performance. Consider a damp cloth for wiping down any surfaces. It’s a small step that can make a big difference in maintaining a fresh cabin environment. Having these tools and materials at hand can transform a routine task into a quick and satisfying DIY project. Are you ready to breathe fresh air on your next drive?
Credit: www.youtube.com
Identifying The Cabin Air Filter Location
Changing your car’s cabin air filter can be a simple task, saving you time and money. But first, you need to identify where the cabin air filter is located. This step is crucial as the filter’s location varies between different car models, and finding it can sometimes feel like searching for hidden treasure. Knowing its location is the key to a smooth replacement process. So, where do you start looking?
Consulting The Vehicle Manual
Your vehicle manual is your best friend when it comes to locating the cabin air filter. It provides detailed information tailored to your specific car model. Often, you’ll find diagrams that indicate the exact position of the filter, making your search significantly easier. Have you ever flipped through the manual only to realize it’s packed with more useful insights than you expected? It’s worth a look!
Common Filter Locations
Once you’ve checked the manual, some common places to look include:
- Behind the Glove Box:In many vehicles, the cabin air filter is tucked away behind the glove box. This is a popular spot as it’s relatively easy to access once you know how to remove the glove box.
- Under the Dashboard:Some cars hide the filter under the dashboard, usually on the passenger side. While it might sound daunting, accessing it is often simpler than it appears.
- Near the Hood:In certain models, you might find the filter under the hood, close to the windshield. This location might require a bit more effort but is still manageable with the right tools.
Have you ever found a filter in an unexpected place? It can feel like a mini victory when you finally spot it. Remember, the key to success is patience and persistence.
Preparing Your Vehicle
Changing your car’s cabin air filter ensures clean air inside. Locate the filter under the glove compartment or hood. Remove the cover, take out the old filter, and insert the new one. Secure it properly to enhance air quality and protect your vehicle’s interior.
Preparing your vehicle to change the cabin air filter is not just a preparatory step; it is a crucial phase that sets the tone for a smooth and hassle-free process. Before diving into the actual filter replacement, ensuring your vehicle is in a conducive state is like laying the groundwork for a successful operation. You’ll find that a little effort in preparation goes a long way in saving time and avoiding unnecessary complications. Have you ever started a task only to realize halfway through that you missed something important? Let’s make sure that doesn’t happen here.Ensuring Safety
Begin by securing your vehicle in a safe location, preferably on level ground. Engage the parking brake to prevent any accidental movements. If your car is parked in a garage, ensure there’s adequate lighting. You don’t want to be fumbling in the dark while handling delicate components. Remember, safety is paramount; you’ll want to avoid injuries and ensure your car remains unharmed during the process.Organizing Work Space
A clutter-free workspace is your best friend. Clear out any debris or items that might obstruct your access to the cabin filter area. Gather all necessary tools beforehand. This might include a screwdriver, flashlight, and the new filter. Consider laying out a mat or cloth to protect your car’s interior from any dirt or damage. Organizing your workspace beforehand is not just about efficiency; it also helps maintain focus and reduces stress. Have you ever tried doing something with clutter around you? It’s distracting, isn’t it? Keep it tidy, and the process will be smoother than you expect.Removing The Old Cabin Air Filter
Changing your car’s cabin air filter is simpler than you might think, and a great way to ensure fresh air flow inside your vehicle. Whether you’re a seasoned DIYer or a first-time car enthusiast, removing the old cabin air filter is a straightforward task that can improve air quality and prevent unpleasant odors. Let’s dive into the steps involved in accessing and removing the old filter.
Accessing The Filter Compartment
Start by locating your car’s cabin air filter compartment. Typically, it resides behind the glove box, under the dashboard, or beneath the hood, depending on your vehicle’s make and model. Check your car’s manual or do a quick online search for guidance specific to your vehicle.
Once you’ve identified the location, clear the surrounding area to prevent any obstructions. This might mean emptying your glove box or moving aside some dashboard panels. You’ll want to have a clear view and easy access to the compartment.
Think about your last encounter with a stubborn bottle cap. Sometimes, these compartments might feel like they’re designed to test your patience. But stay calm and follow the instructions patiently. You might surprise yourself with how easily it opens!
Taking Out The Old Filter
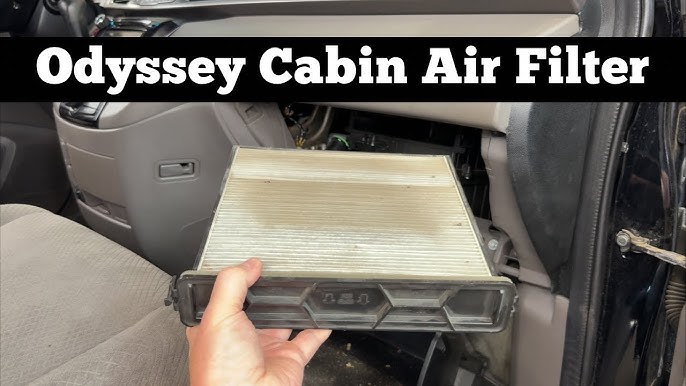
With the compartment open, your next task is removing the old filter. You’ll often find it encased in a protective housing. Gently pull the filter out, ensuring you don’t damage any surrounding clips or parts. If it feels stuck, a slight wiggle usually does the trick.
As you slide it out, take a moment to inspect the filter. Is it full of dust and debris? A grimy filter can drastically affect your car’s air quality. This is your opportunity to prevent those sneezes and coughs that come from driving through pollen season with a clogged filter.
Reflect on how often you change your own air filter at home. Shouldn’t your car deserve the same attention? Give yourself a pat on the back for taking this step towards a fresher driving experience.
Installing The New Cabin Air Filter
Replacing the cabin air filter ensures clean air in your car. Locate the filter behind the glove box or under the dashboard. Remove the old filter, insert the new one, and secure it properly.
Installing a new cabin air filter might seem daunting, but it’s surprisingly simple and can be done in just a few minutes. A fresh filter ensures that the air inside your car remains clean and free of pollutants. By following some straightforward steps, you’ll be breathing easier in no time.Choosing The Right Replacement Filter
Before you begin, ensure you have the correct replacement filter for your vehicle. Check your car’s manual or look online for the specific filter model compatible with your car. It’s a good idea to choose a high-quality filter to enhance air quality and capture more dust and allergens. Don’t just go for the cheapest option. Investing in a good filter pays off in the long run. Some filters even come with activated carbon to help reduce odors—an excellent choice if you want a fresher interior.Proper Placement And Alignment
Once you have the right filter, it’s crucial to place it correctly. Most cabin air filters have arrows indicating the airflow direction. Ensure these arrows align with the airflow direction in your vehicle, usually indicated in the filter compartment. A filter installed upside down can reduce its efficiency. Take a moment to double-check the alignment before securing it in place. If you’re unsure, refer to your car’s manual or consult online resources for guidance specific to your make and model. What happens if you install it incorrectly? You might notice decreased air quality or reduced airflow in your car. Proper placement is key to maximizing the filter’s benefits and ensuring a pleasant ride.
Credit: www.youtube.com
Reassembling And Final Checks
Place the new cabin air filter in its slot, ensuring it fits snugly. Secure all parts back into position. Conduct final checks to confirm everything is properly aligned and functioning.
Reassembling your car’s cabin air filter compartment and conducting final checks are crucial steps to ensure everything is in place and functioning perfectly. After successfully replacing the filter, it’s time to put everything back together and confirm that your efforts have paid off. By following these next steps, you’ll ensure clean air flows efficiently through your vehicle’s cabin, keeping you and your passengers comfortable and healthy.Securing The Filter Compartment
Ensure the filter is snugly positioned in its compartment. This might seem simple, but a loose filter can lead to inefficient airflow or even allow unfiltered air to enter the cabin. Reattach the cover or panel that you removed earlier. Using the screws or clips, fasten it securely. A rattling noise while driving could indicate that something isn’t tight enough, so double-check all fastenings.Testing The Airflow
Turn on your car and set the air conditioning or heater to the highest setting. Feel the airflow from the vents to ensure it’s strong and consistent. If the air feels weak or uneven, there may be a misalignment or blockage in the filter compartment. Check for any unusual sounds. A properly secured filter should not cause any additional noise. If you hear any whistling or rattling, it may be necessary to revisit the reassembly process. Taking these steps helps ensure your cabin air filter is installed correctly and functioning optimally. Have you noticed an improvement in air quality inside your vehicle? Your feedback can help others facing similar issues.Maintenance Tips
Regular maintenance of your car’s cabin air filter is crucial. It ensures clean air inside your vehicle. Keeping it in good condition improves air quality and reduces allergens. It also prevents unpleasant odors. In this section, you’ll find maintenance tips. These tips will help you keep your cabin air filter in optimal condition.
Recommended Replacement Frequency
Replace your cabin air filter every 12,000 to 15,000 miles. Check your car’s manual for specific guidelines. Some vehicles may require more frequent changes. Consider your driving environment too. Dusty or polluted areas may need more frequent replacements. Regular checks are beneficial. This prevents unexpected issues and ensures consistent air quality.
Signs Of A Failing Cabin Air Filter
A clogged filter can reduce airflow inside your car. Notice any musty or unpleasant smells? This could signal a failing filter. Check for increased dust on your dashboard. It might indicate a dirty filter. If your HVAC system is noisy, inspect the filter. A clogged filter can strain the system. Regular inspection helps identify these signs early.

Credit: www.youtube.com
Frequently Asked Questions
How Often Should I Change My Car Cabin Air Filter?
The cabin air filter should be changed every 15,000 to 30,000 miles. Check your vehicle’s manual for specific guidelines. Regular replacement ensures clean air and optimal HVAC performance. If you notice reduced airflow or unpleasant odors, it’s time to inspect and possibly change the filter.
Can I Change The Cabin Air Filter Myself?
Yes, changing the cabin air filter is a simple process. Locate the filter, usually behind the glove box or under the dashboard. Remove the old filter, insert the new one, and secure it. Consult your vehicle’s manual for detailed instructions and ensure you use the correct filter type.
What Are Signs Of A Dirty Cabin Air Filter?
A dirty cabin air filter may lead to reduced airflow and bad odors inside your car. It can also affect HVAC efficiency, causing the system to work harder. If you notice any of these symptoms, inspect your filter. Regular maintenance helps maintain air quality and system performance.
Do Cabin Air Filters Affect Fuel Efficiency?
Cabin air filters don’t directly impact fuel efficiency. However, a clogged filter can stress the HVAC system, slightly affecting engine performance. Keeping the filter clean ensures optimal airflow and engine operation. Regular maintenance contributes to overall vehicle efficiency and comfort.
Conclusion
Changing your car’s cabin air filter is simple. Follow the steps above to breathe cleaner air. Regular replacement ensures better air quality and a healthier ride. A clean filter keeps dust and pollen away, improving comfort while driving. Don’t wait too long to replace it.
Your car and lungs will thank you. Check your car manual for guidance on filter type and replacement schedule. Always dispose of old filters responsibly. Stay proactive with car maintenance. Enjoy a fresher drive every time. Keep your air filter clean, and travel with peace of mind.
Safe travels!