Are you hearing strange noises coming from your car’s engine, or maybe you’ve noticed it’s running hotter than usual? These could be signs that your water pump is failing.
You might think changing a water pump sounds like a job for a professional mechanic, but with the right guidance, you can tackle this task yourself. Imagine saving money and gaining the satisfaction of fixing your car with your own hands.
You’ll learn how to change a water pump on a car, step by step. We’ll guide you through each part of the process, ensuring you feel confident and empowered. Let’s dive in and get your car back to running smoothly.
Tools And Materials Needed
Tools and Materials Needed Gather essential tools like wrenches, screwdrivers, and a drain pan. Prepare necessary materials such as a new water pump, gaskets, and coolant. Ensure you have protective gloves and safety glasses for safe handling.
Changing a water pump on your car can feel like a daunting task, but with the right tools and materials, you can tackle this job with confidence. Whether you’re a seasoned DIY enthusiast or a beginner looking to learn, having the proper equipment at your disposal makes all the difference. Without the right tools, you might find yourself frustrated or, worse, causing more damage to your vehicle. So, what do you need to get the job done efficiently? Let’s dive into the essential tools and materials required for a smooth water pump replacement.
Basic Hand Tools
To start, you will need a good set of basic hand tools. A socket set, including various sizes, will be your best friend. Make sure you have both metric and standard sizes, as car manufacturers can use either.
Specialized Tools
Some vehicles might require specialized tools such as a pulley puller or a serpentine belt tool. Check your car’s manual to see if any specific tools are needed for your model.
New Water Pump
Of course, the centerpiece of this operation is the new water pump itself. Ensure you purchase a pump that matches your car’s make and model to avoid compatibility issues.
Gasket And Sealant
A new gasket and sealant are essential to prevent leaks. Often, these come with the new water pump, but it’s always good to verify before starting the replacement.
Coolant
You’ll need fresh coolant to refill the system after replacing the pump. Consider buying a premixed solution to simplify the process.
Drain Pan
A drain pan will catch the old coolant as you drain the system. This prevents spills and helps you dispose of the coolant properly.
Safety Gear
Safety glasses and gloves are crucial to protect yourself from chemicals and sharp components during the repair. Don’t overlook this aspect—your safety is paramount. Having these tools and materials ready before you start can save you time and prevent unexpected trips to the store. Are there any tools you always keep handy for car repairs?

Credit: www.youtube.com
Preparing The Vehicle
Changing a water pump in your car can feel like a daunting task, especially if you’re not familiar with the inner workings of your vehicle. But with the right preparation, you can tackle this project safely and efficiently. Before you dive into the mechanics, it’s crucial to prepare your vehicle properly. This stage is not just about gathering tools; it’s about setting the stage for a smooth and successful repair process.
Ensure Safety
Safety should be your top priority. Start by parking your car on a flat, stable surface. Engage the parking brake to prevent any accidental movement. Wearing protective gear, like gloves and safety glasses, can help prevent injuries from sharp parts or unexpected spills.
Think about the workspace. Is it well-lit? Do you have enough room to maneuver around your vehicle? Having a clear, organized area can make a significant difference. You don’t want to be tripping over tools or struggling to find parts when you need them.
Drain The Coolant
Draining the coolant is an essential step in preparing your vehicle. Coolant can be hazardous, so handle it carefully. First, locate the radiator drain plug, usually situated at the bottom of the radiator.
Before opening the plug, place a catch pan beneath to collect the coolant. This prevents spills and allows for proper disposal later. Once the coolant is drained, examine it. Is it murky or discolored? This might indicate a need for additional maintenance beyond the water pump.
Remember, coolant can be recycled at many auto shops. Consider this eco-friendly option instead of simply discarding it. What does your choice say about your commitment to sustainability?
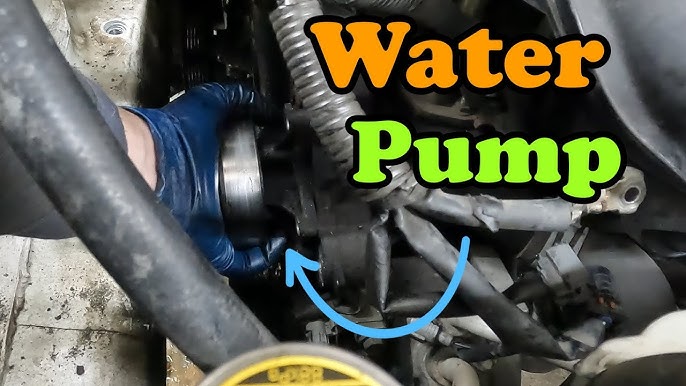
Accessing The Water Pump
Accessing the water pump requires careful removal of surrounding components. Begin by disconnecting the battery for safety. Next, remove belts and hoses to reach the pump.
Accessing the water pump is a crucial step in replacing it. Proper access ensures a smooth removal and installation process. Prepare your tools and workspace. Keep safety in mind. Here’s how to access the water pump efficiently.
Remove Engine Covers
Start by removing the engine covers. These covers protect engine components. Use a screwdriver to unscrew the bolts. Keep the screws in a safe place. Gently lift the covers away. This provides a clearer view of the engine.
Detach Belts And Pulleys
The next step involves detaching belts and pulleys. Locate the serpentine belt. Use a wrench to release tension. Slide the belt off the pulleys. Note the belt’s path for reinstallation. Next, remove any pulleys blocking the water pump. Use the correct socket size for bolts. Be careful not to drop any bolts. Store them in a small container. This ensures you don’t lose track of parts.

Credit: www.youtube.com
Removing The Old Water Pump
Removing the old water pump involves draining the coolant and disconnecting hoses. Carefully loosen and remove bolts securing the pump. Ensure the gasket is intact before installing a new pump to prevent leaks.
Removing the old water pump from your car can seem daunting, but with a clear approach, you can tackle it with confidence. First, ensure your car is on a level surface and has had time to cool down. Remember, safety is key—use jack stands to support your vehicle securely.
Unscrew The Pump
Start by locating the bolts that hold the water pump in place. They’re usually around the perimeter of the pump. Keep a container nearby for storing the bolts to avoid losing any. Using a wrench, carefully unscrew each bolt. If they feel stuck, apply a bit of penetrating oil and let it sit for a few minutes. This can make the removal process smoother. Once all bolts are removed, gently wiggle the pump to break the seal. If it’s still stuck, a soft tap with a rubber mallet can help. Be cautious not to damage any nearby components.
Clean The Mounting Surface
After the old pump is off, you’ll see the mounting surface where it was attached. This area needs to be clean for the new pump to seal properly. Any leftover gasket material or debris can cause leaks. Use a scraper to remove any old gasket remnants. Be thorough, but gentle to avoid scratching the surface. Finish by wiping the area with a clean rag and some degreaser. This ensures no oil or dirt remains, providing a fresh start for the new pump installation. Have you ever found something unexpected while cleaning a car part? It’s surprising how much grime can build up unnoticed. This step not only prepares the surface but also gives you a chance to inspect other components for wear and tear.
Installing The New Water Pump
Changing a water pump in a car involves removing the old pump and installing a new one securely. Ensure all bolts are tightened properly and check for leaks after installation. This process requires patience and attention to detail for optimal performance.
Installing a new water pump in your car might sound daunting, but with a clear plan and patience, you can handle it like a pro. This step is crucial as it ensures your car’s engine remains cool and functions efficiently. So, let’s dive into the process of fitting that new pump and getting your car back on the road.
Position The New Pump
First, ensure the gasket surface on the engine block is clean and smooth. Any debris or old gasket material can prevent a proper seal, leading to leaks. Carefully position the new water pump in place. Align it with the mounting holes, ensuring it’s seated evenly. A handy tip: lightly oil the O-ring or gasket to ensure it fits snugly without pinching or tearing. Have you ever tried fitting a puzzle piece in the wrong slot? It’s frustrating, right? The same principle applies here. Take your time to ensure everything aligns.
Secure The Bolts
Start by hand-tightening the bolts to keep the pump in place. This prevents cross-threading, which can damage the bolt holes. Once all bolts are in position, use a torque wrench to tighten them according to the specifications in your car’s manual. Using the right torque is vital. Too loose, and you might have leaks; too tight, and you risk damaging the threads. Create a pattern by tightening opposite bolts to maintain an even seal around the pump. Think of it like tightening the lug nuts on a wheel for balanced pressure. By following these steps, you’ll ensure the new water pump is installed correctly, setting the stage for a smooth and efficient car operation. Are you ready to take on this DIY challenge?
Reassembling The Components
Reassembling the components involves carefully putting back parts removed during the water pump replacement. Ensure each piece fits snugly and securely. Double-check connections to prevent leaks and ensure optimal performance.
Reassembling the components after changing a water pump is crucial. It ensures everything functions correctly. This step involves putting back belts, pulleys, and covers. These parts must be in the right place. Each component plays a vital role in the engine’s operation. Proper reassembly prevents future issues and keeps your car running smoothly.
Reattach Belts And Pulleys
Start by reattaching the belts and pulleys. Check the belt for wear or damage. If needed, replace it with a new one. Align the pulleys properly. Use a wrench to tighten the bolts securely. Ensure the belt has the correct tension. A loose belt can cause engine problems. Spin the pulleys by hand to check alignment. They should move freely without wobbling.
Replace Engine Covers
Once belts and pulleys are in place, replace the engine covers. Clean the covers before placing them back. Remove any dirt or oil residue. Align the covers with the bolt holes. Insert the screws and tighten them evenly. Use a screwdriver for precision. Ensure all covers fit snugly and securely. This protects the engine from debris and moisture. Properly fitted covers also reduce engine noise.
Refilling The Coolant System
Refilling the coolant system is crucial after replacing a water pump. Ensure the engine is cool before starting. Slowly fill the system with coolant to prevent air pockets. Run the engine briefly, then check for leaks.
Refilling your car’s coolant system after changing the water pump is a crucial step in ensuring the engine runs smoothly and efficiently. Without proper refilling, your engine could overheat, leading to potential damage. It’s not just about adding liquid; it’s about doing it right to maintain the optimal performance of your vehicle.
Add Coolant
Begin by mixing the appropriate ratio of coolant and distilled water, usually 50:50, unless specified otherwise by your vehicle’s manual. Carefully pour the mixture into the radiator, using a funnel to avoid spills. Remember, it’s essential to fill it to the recommended level, as too little or too much can both cause issues. Why is the right mixture important? It ensures your engine is protected from extreme temperatures and corrosion. You might be tempted to use tap water, but distilled water is a better choice because it prevents mineral deposits.
Bleed The System
After filling, bleeding the system is necessary to remove any air pockets that could hinder coolant flow. Start your engine and let it idle with the heater turned on. This helps circulate the coolant and dislodge trapped air bubbles. Watch for the thermostat to open, which you can usually tell by a sudden drop in coolant level or a change in engine temperature. Carefully add more coolant if needed, and keep an eye on the temperature gauge to ensure it stays within a normal range. Ever thought about why air bubbles are so problematic? They can cause your engine to overheat because they block the coolant’s path. Make sure to check for bubbles periodically to prevent this issue. Refilling the coolant system isn’t just a mechanical task; it’s about taking care of your car’s heart. Are you ready to ensure your vehicle runs smoothly and efficiently?
Testing The Installation
Testing the Installation Ensure the new water pump is working by starting the car. Look for leaks around the pump. Check if the engine temperature remains stable.
Testing the installation of your new water pump is crucial. Ensuring everything works smoothly helps avoid future issues. This step is important for your car’s reliability. Let’s dive into the essential checks.
Check For Leaks
Start by checking for leaks around the water pump. Look for any signs of coolant dripping. Use a flashlight to inspect all areas. Check the connections and hoses for any moisture. Leaks can lead to engine overheating. Fix any leaks immediately to prevent damage.
Monitor Engine Temperature
Keep an eye on your engine’s temperature gauge. Start the car and let it idle. Observe the gauge as the engine warms up. The temperature should stay within normal range. If it rises too high, there’s a problem. High temperatures can damage your engine. If overheating occurs, revisit your installation steps.

Credit: www.youtube.com
Frequently Asked Questions
What Tools Are Needed To Change A Water Pump?
To change a water pump, you’ll need a wrench set, screwdrivers, a drain pan, and a gasket scraper. A torque wrench is essential for precise tightening. Ensure you have replacement gaskets and coolant on hand. Prepare by reviewing your vehicle’s service manual for specific requirements.
How Long Does It Take To Replace A Water Pump?
Replacing a water pump typically takes 2-4 hours. This depends on your vehicle model and experience level. Professional mechanics may complete the task faster. Ensure you allocate enough time for unforeseen challenges. Always follow the vehicle manual instructions for a smoother process.
Can I Drive With A Faulty Water Pump?
Driving with a faulty water pump is not recommended. It can lead to engine overheating, causing severe damage. Immediate replacement is crucial to avoid costly repairs. If you suspect a fault, consult a mechanic promptly. Regular maintenance helps prevent such issues.
What Are Signs Of A Bad Water Pump?
Signs include coolant leaks, overheating, and unusual noises from the engine. You might notice steam or rust near the pump area. Reduced coolant circulation can cause engine performance issues. Regularly check for these symptoms to prevent further damage. Immediate attention is advised.
Conclusion
Changing a car’s water pump is easier than it seems. Follow the steps carefully. Use the right tools. Ensure your car is cool before starting. Safety first. Double-check each part after installation. Listen for strange noises. Leaks mean something’s wrong.
Seek help if unsure. Regular maintenance prevents bigger problems. Save money by doing it yourself. Understanding your car boosts confidence. Enjoy smoother rides with a well-functioning water pump. Keep learning and improving your skills. Happy driving!