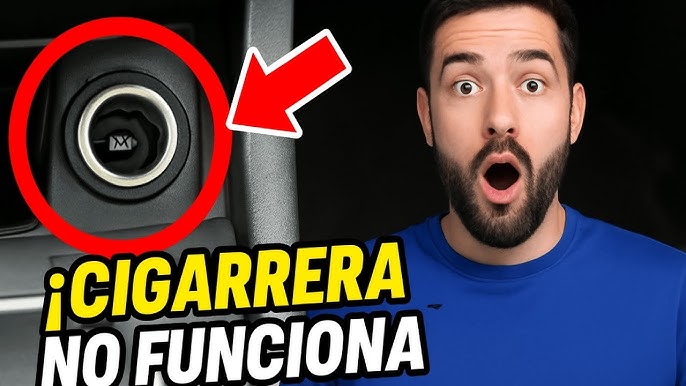
Have you ever reached for your car’s lighter only to find it unresponsive or malfunctioning? You might be wondering why such a small, yet crucial component isn’t working when you need it most.
Don’t worry; you’re not alone. Many car owners face this annoying issue, and the good news is that fixing a lighter in your car can be simpler than you think. Imagine the relief of having it functional again without the need for a costly visit to the mechanic.
In this guide, you’ll discover straightforward steps to diagnose and repair your car’s lighter, empowering you to solve the problem with ease. Keep reading to learn how to regain the convenience and reliability of your car’s lighter in no time.

Credit: www.reddit.com
Common Lighter Issues
Car lighter issues often stem from loose connections or blown fuses. Check the fuse box for any damage. Ensure the lighter socket is clean and secure.
Car lighters often face common issues that disrupt their functionality. Recognizing these problems helps in fixing them effectively. Here are some typical lighter issues you might encounter and how to address them.
No Power
A lighter without power is often due to a blown fuse. Check your car’s fuse box for any blown fuses and replace them. Sometimes, the lighter socket itself might be faulty. Using a multimeter can help determine if the socket is receiving power. If not, the wiring might need inspection.
Loose Connections
Loose connections cause intermittent lighter problems. Inspect the socket and wiring for any loose or disconnected parts. Tighten any loose connections you find. If the socket feels loose, it might need a replacement. Sometimes, removing and reseating the lighter can solve loose connection issues.
Obstructions
Debris or dirt in the socket can block the lighter’s function. Clean the socket with a soft brush or compressed air. Ensure no foreign objects are lodged inside. Regular cleaning prevents obstruction-related issues. If cleaning doesn’t help, inspect the socket for damage.

Credit: www.reddit.com
Troubleshooting Techniques
Fixing a car lighter involves checking the fuse, inspecting for debris, and ensuring proper connections. Carefully examine the lighter socket for any foreign objects that may block it. If necessary, replace the fuse or clean the socket to restore functionality.
Troubleshooting a faulty car lighter involves a few systematic techniques. These steps help identify and resolve common problems, ensuring your device works efficiently. By following these methods, you can diagnose the issue without needing professional help.
Check Fuse
The car lighter relies on a fuse for power. A blown fuse is a common issue. Locate your car’s fuse box. Refer to the owner’s manual for its location. Check the diagram on the box’s lid for the lighter’s specific fuse. Remove the fuse with a fuse puller or tweezers. Hold it up to the light. A broken wire inside indicates it’s blown. Replace it with a fuse of the same rating.
Inspect Wiring
Wiring issues can prevent the lighter from working. Turn off the car and disconnect the battery. Check the wires connected to the lighter socket. Look for any visible damage or loose connections. Ensure all wires are secure and in good condition. Use electrical tape to fix minor damage. If wires are severely damaged, they may need replacing.
Test Lighter Socket
The lighter socket itself can malfunction. Insert a voltmeter probe into the socket. Set the voltmeter to DC voltage. Touch the positive probe to the socket’s center. Place the negative probe against the side. A reading should display if the socket has power. If no power is detected, the socket may need replacing. Ensure the socket is clean and free from debris.
Diy Repair Steps
Check the fuse box for a blown fuse. Replace if necessary. Inspect the lighter socket for debris. Clean it gently. Ensure the lighter element is not damaged. Replace the lighter if needed. Test the lighter by plugging it in. Confirm it heats properly.
Fixing the lighter in your car can be a straightforward task if you are equipped with the right knowledge and tools. Understanding how to execute these DIY repair steps can save you time and money while ensuring your car’s accessories continue to function seamlessly. Whether it’s a road trip or a quick drive, having a functioning lighter socket is essential for charging devices or using other car gadgets. Let’s dive into these practical steps to get your car’s lighter back in working order.
Replacing The Fuse
A blown fuse is often the culprit behind a non-functional car lighter. First, locate your car’s fuse box, usually found under the dashboard or in the engine compartment. Check the car manual to identify the specific fuse associated with the lighter. Once located, carefully remove the fuse using a fuse puller or a pair of needle-nose pliers. Inspect the fuse to see if the metal strip inside is broken. If it is, replace it with a new fuse of the same amperage. This simple fix often restores functionality.
Cleaning The Socket
Dirt and debris can accumulate in the lighter socket, preventing proper contact. Begin by turning off your car to ensure safety. Use a flashlight to inspect the socket for visible debris. A can of compressed air can help dislodge any dust or particles inside. For a more thorough clean, use a cotton swab dipped in rubbing alcohol to gently clean the interior. Ensure the socket is dry before testing it with a lighter or charger.
Securing Loose Wires
Loose or disconnected wires can interrupt power flow to the lighter. Start by disconnecting the car battery to avoid any electrical issues. Access the back of the lighter socket, which may require removing a panel. Carefully check for any loose or disconnected wires. Secure any loose wires by tightening the connections or using electrical tape to reinforce them. Reattach the panel and reconnect the battery to see if the repair was successful. — These DIY steps are practical and straightforward, but they require some basic tools and a bit of patience. Have you ever fixed your car lighter on your own? What challenges did you face, and how did you overcome them? Share your experiences and insights in the comments below!
Tools And Materials Needed
A screwdriver, pliers, and a clean cloth are essential for fixing a lighter in your car. Having replacement parts like a new fuse or lighter socket can be helpful too. Be sure to gather these tools before starting the repair.
To fix a car lighter, gather the right tools and materials. Having the proper items ensures a smooth and efficient process. This section outlines the essentials for the task.
Basic Tool Kit
A basic tool kit is necessary for this repair. Ensure it includes:
- Screwdrivers (flathead and Phillips)
- Pliers
- Socket wrench set
These tools help in accessing and removing the lighter.
Replacement Parts
You might need replacement parts for the lighter. These can include:
- New lighter socket
- Fuse
- Wiring connectors
Having these parts ready is crucial for a proper fix.
Cleaning Supplies
Cleaning supplies aid in maintaining the lighter area. Gather:
- Rubbing alcohol
- Soft cloths
- Compressed air canister
These items ensure the lighter is clean and free from debris.
Preventive Measures
Regularly check the lighter socket for debris. Clean contacts gently with a soft cloth. Inspect for blown fuses and replace if needed.
Preventive measures play a crucial role in maintaining your car lighter. By following a few simple steps, you can ensure it functions smoothly. These steps also extend the lifespan of the lighter.
Regular Maintenance
Regularly check the lighter for any signs of wear or damage. This helps catch problems early and avoid bigger issues. Test the lighter often to ensure it works properly. If it feels loose, tighten it to prevent further damage. Replace the lighter if it shows signs of corrosion.
Avoid Overloading
Avoid plugging too many devices into the car lighter socket. Overloading the socket can lead to overheating and damage. Use only one device at a time to keep the socket safe. Choose devices that draw minimal power to reduce strain on the lighter.
Keep Area Clean
Keep the area around the car lighter clean. Dust and debris can accumulate and affect its performance. Use a soft cloth to wipe the socket and lighter regularly. A clean lighter works better and lasts longer. Store small items elsewhere to prevent them from falling into the socket.

Credit: www.reddit.com
Frequently Asked Questions
Can The Cigarette Lighter In A Car Be Fixed?
Yes, you can fix the cigarette lighter in a car. Check the fuse first, as it might be blown. If the fuse is fine, inspect the lighter socket and wiring for any issues. Replacing the lighter socket or the wiring may solve the problem.
Why Is My Lighter Not Working In My Car?
Your car lighter might not work due to a blown fuse, faulty lighter socket, or wiring issues. Check the fuse first. If it’s intact, inspect the lighter socket for debris or damage. Wiring problems may require professional assistance. Regular maintenance helps prevent lighter malfunctions.
How Much Does It Cost To Fix The Cigarette Lighter In Your Car?
Repairing a car’s cigarette lighter typically costs between $10 and $50. Parts might cost less, while professional labor can increase the price. Prices vary based on your car model and repair location. Always consult a trusted mechanic for an accurate estimate tailored to your specific needs.
How To Fix Lighter If Not Working?
Check the fuel level and refill if necessary. Clean the nozzle to remove debris. Adjust the flame height. Replace the flint or igniter if worn out. Test after each step to ensure functionality.
Conclusion
Fixing a car lighter can be simple with the right steps. Start by checking the fuse and replace it if needed. Ensure all connections are secure and clean. If the lighter still doesn’t work, consider replacing the socket or lighter element.
These basic steps should resolve most issues. Remember, safety is important. Always disconnect the battery before repairs. Regular maintenance can prevent future problems. A functional car lighter is convenient for charging devices. With these tips, you can easily fix your car lighter.
Enjoy a stress-free drive with all your gadgets powered up!